Be the first to comment.
| Perfectly Personalized Easter Basket |
| Written by Joscelyne Cutchens, Contributing Editor | |
|
{JCSBOT SUBSCRIPTION=10,13,16,18,21,23} 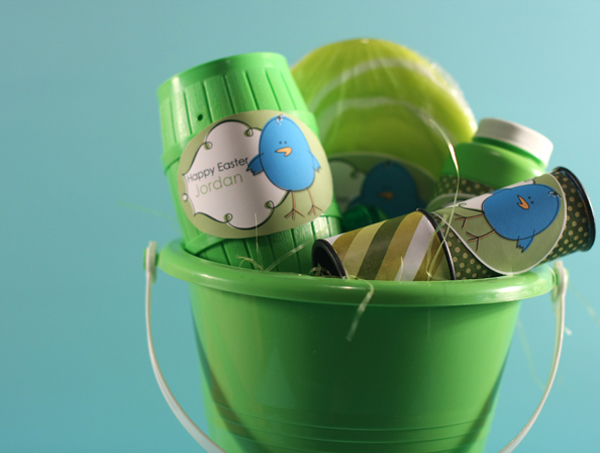 (Video showing computer techniques at end of article.) I created this personalized Easter Basket for my son using a Sand Bucket and a few inexpensive toys. I picked up this bucket from Wal-Mart for a few dollars and most of the toys were from Wal-Mart or Target for a few dollars as well. I looked for items in green that had surfaces I could add a label for personalization. To create the personalization labels, I chose TaySilver_HorizontalMat2.png and MissMint_CutesyDoodleDoo_Chickee1.png both available at www.peppermintcreative.com. (Video showing computer techniques at end of article.) I duplicated the mat and closed the original. Then I resized the mat a little smaller on the canvas. Using the magic wand tool I selected inside the mat. I added the little loops on the left and right to the selected area by holding down shift and clicking inside the little loops. I created a new layer under the mat and get the bucket tool (or use shortcut key K) to fill in the selected area with white. Ctrl-D to deselect the area. Get the move tool (shortcut key V) and move the white layer just slightly out of line with the mat to mimic the coloring on the chick. Double Click on the Chick thumbnail in the bin. (Shortcut key K) Use the bucket tool to recolor the Chick from yellow to blue. Zoom in to be sure to color all the yellow spots blue. When done recoloring, get the move tool (shortcut key V). Click and drag the chick to the mat. Resize the chick as needed to fit on the side of the mat but still overlapping one side. Add a drop shadow to the chick. Select the custom shape tool and draw an oval behind the mat and chick being sure the oval is larger than the other two items. Using the text tool, add the personalization to the mat. Duplicate the chick by holding alt, click and drag. Print as many copies as you need. Trim around the oval leaving a little white edge. Adhere to items. I had some leftover patterned paper from my last project (MissMint_JingleBellRock_xmaswreath and MissMint_CandyCaneStripe_sugarstripe) and trimmed to cover the original labels, finishing with the personalized labels. Video for computer techniques in this project: | |
|
» Comment here!
» Post Comment
Only registered users can write a comment.
Please login or register. |
|
| < Prev | Next > |
|---|